In this tutorial, we’ll show you how to create a website with a driving directions tool. This way, your visitors can easily find your location from wherever they are located. This is great for retail businesses who rely on in-store foot traffic to make sales (i.e. restaurants, clothing stores, etc.). We will do a step-by-step guide using our free website builder to show you how easy it is to add a driving directions tool when you are creating a website for business.
1. Click Add to your webpage button. Please see screenshot below.
2. Next try to play around with the settings or use the default set up. In this example, the title message has been changed. Please click the Get the Code button once you’re done. Please see screenshot.
3. Next, copy the entire code. You can highlight or hold CTRL – A to copy all code. Please see an example shot below.
4. Login to your Iconosite account and choose which part of your page to place the google direction gadget. In this example, it’ll be placed at the home page.
5. Scroll down towards your content editor and click the HTML icon as seen in the screenshot below. You’ll be placing the code that you’ve just copied. Please click the HTML icon.
6. Now just paste the code into the HTML source editor pad then click UPDATE button to save. Please see screenshot below.
7. Save your work and checkout website then try the gadget.
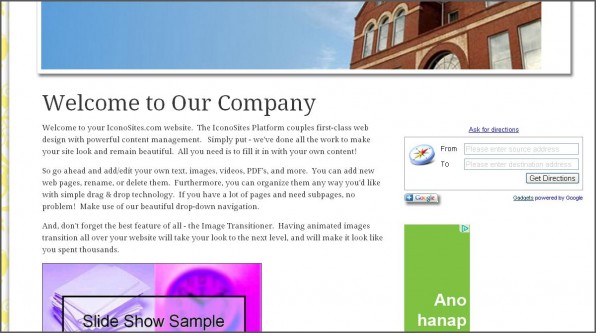
8. You should be able to see google direction gadget in your webpage. Finish.

And that’s it! You now have a driving directions tool on your small business website, and it only took about one minute to implement. Our final suggestion is to make sure you add this to your contact page or somewhere where your visitors can easily find it. This could be in your header, footer, or on key pages. Feel free to play around with it and see which provides the best results for you. Our free website creator empowers you to change these things on the fly in seconds, so you should definitely take advantage of that.