In this tutorial, we’ll show you how to add a form to a website using the IconoSites website builder. While you can build any type of form you would like, we’ll show you how to make a quick contact form.
Video Tutorial
If you prefer to watch a video tutorial, here it is
(otherwise, continue with the written tutorial below):
Written Tutorial
1. Go to https://www.123contactform.com/ website and sign up a free account.
2. Login to your 123contactform account then click Contact Form.
3. Next type a name for your contact form.
4. On the next step, you may optionally customize or change the values of the field but to make this tutorial quick, we’re going to leave the default values. Please click the Continue button.
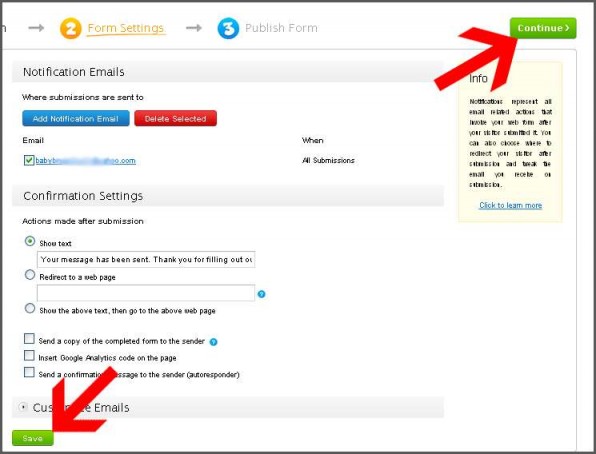
5. Next step is optional, you may click the small box if you want to be notified whenever there are new submissions, else you may leave it uncheck. Below are also some other options to change any values of your form, if you make any changes just simply click SAVE button. After doing so, please click the Continue button.

6. Next is to click the Embed Code button from the left, then copy the Javascript code (highlight + right click + copy). Please see the screenshot below. Once you’re done, you may click the Finished button.
7. Login to your Iconosites account and select the default Contact page. Then click Edit to make changes. Please see screenshot below.
8. Next scroll down onto the page and click the HTML tool. Please see screenshot below.
9. This will bring up the HTML editor, next is to paste the code that you’ve just copied from 123contactform. Then click Update Button once pasted. Then click X button to close the HTML Editor.
10. Last step is to click the Save button. Now check your website’s contact form. You’ll see something like the image below. Congratulation’s you’ve just successfully embedded a simple contact form into your IconoSites website.